

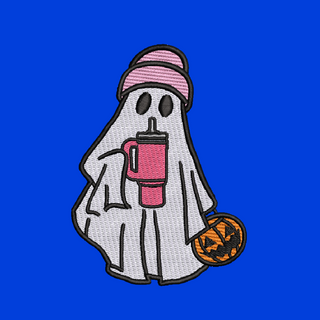
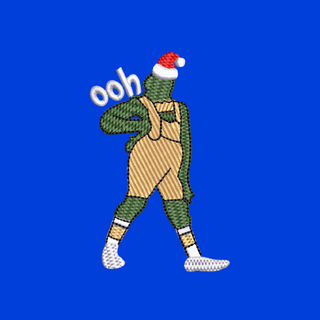


3mm Thickness

9" x 12" Sheet Size

Machine Washable

Non-toxic

Water-Resistant

Use Caution with Heat
WATCH IT IN ACTION
Watch Sew Puffed™ in action across real embroidery projects, from hats and apparel to in-the-hoop creations.
PUFF BASICS
How to Get the Best Results with Sew Puffed™ Dense Embroidery Foam


Choose a fabric that is suitable for 3D puff embroidery. Medium to heavyweight fabrics generally provide the best support.
Throughout my testing, I've primarily embroidered on structured hats, unstructured hats, and sweatshirts with great results. 3D puff designs have a much higher density than standard embroidery, I generally do not recommend using them on lightweight fabrics. The increased stitch density can cause lightweight materials to pucker, distort, or lose stability during embroidery.
As with any embroidery project, I recommend stitching a sample first to determine the best settings for your fabric and design.
Proper stabilization helps reduce movement during stitching and produces cleaner, more consistent results.
Here's what I've been using during my testing:
• Hats: 1 layer of 3 oz tear-away stabilizer
• Sweatshirts: 2 layers of 2.5 oz cutaway stabilizer
• Bag Tags: 2 layers of 1.8 oz tear-away stabilizer
Every machine, fabric, and design is different, so always do a sample stitch to determine what works best for your project.
Using embroidery designs that have been digitized specifically for 3D puff is essential.
Here's what I've found while working with Sew Puffed™ Dense Embroidery Foam:
1. My 3D Puff designs and fonts with wider satin columns require much less cleanup than 3D puff designs with thin or narrow details. The wider the satin stitch, the easier it is to achieve clean foam removal.
2. Check out the Digitizing for Sew Puffed™ section below. I've found that using an edge run stitch before the final satin stitch helps perforate the foam, making it easier to remove after embroidery and resulting in a cleaner finish.
Try to match your foam color to your thread color whenever possible.
Black foam pairs well with darker thread colors, while white foam works well with lighter thread colors.
White foam was used in the before-and-after photos for testing purposes only.
I used a sharp 75/11 embroidery needle throughout my testing. Although the standard recommendation for 3D puff is often a needle with a shorter shank and longer blade, I achieved excellent results using a standard sharp 75/11 embroidery needle.
This setup worked well on my Barudan, Ricoma, and Brother embroidery machines. However, every machine is different, so if you're experiencing thread breaks or inconsistent results, you can also experiment with other needle types and sizes to determine what works best for your machine and fabric.
Due to the higher stitch density of 3D puff designs, it's recommended to embroider at a slower speed than you normally would for standard, non-puff embroidery designs. Machine settings vary, so there isn't one speed that works for every machine. Consider starting at a slower speed than you typically use and adjust as needed based on your machine, design, and the results you're seeing.
The two tools I recommend having on hand are a heat gun or lighter and something with a sharp, pointed tip, such as a pair of tweezers.
After removing the excess foam, use your tweezers to pick away or tuck in any larger pieces that may still be attached to the design. Once those have been removed, use a heat gun or lighter to shrink away any remaining foam fibers for a cleaner, more polished finish.
Items embroidered with Sew Puffed™ Dense Embroidery Foam can be machine washed. However, avoid excessive heat when drying, as prolonged exposure to high heat can cause the foam to continue shrinking, reducing the raised 3D effect over time.
Safety Notice: EVA embroidery foam is flammable. Use caution when working with a heat gun or lighter. Keep the heat source moving, avoid excessive heat, and never leave an open flame unattended.
DIGITIZING FOR SEW PUFFED™
General Digitizing Tips when working with Sew Puffed™ Dense Embroidery Foam

Use a running stitch to tack the foam to the fabric before the final satin stitch. This helps prevent the foam from shifting during the embroidery process and ensures it stays in position until it's completely covered.
3D puff embroidery requires a significantly higher stitch density than standard embroidery. The stitches should be close enough to completely cover the foam and provide adequate perforation for clean removal after embroidery.
The exact stitch density will vary depending on your digitizing software, design, satin width, thread, and foam thickness. Rather than relying on one universal setting, always test your design and make adjustments as needed to achieve complete coverage and a clean, well-defined raised finish.

For most 3D puff designs, minimal or no underlay is generally recommended. Excessive underlay can flatten the foam and reduce the overall raised 3D effect.
However, I've found that using an edge run underlay with Sew Puffed™ Dense Embroidery Foam can help perforate the foam before the final satin stitch. This often makes the foam easier to remove and results in a cleaner finished design.
While it's not absolutely essential, it's a great technique to use if you have the option.

Open ends of satin columns should be capped to completely cover the foam and prevent it from protruding through the ends of the design. End caps also help the excess foam tear away more cleanly from open ends, reducing the chance of small pieces being left behind and resulting in a cleaner finished design.

Some 3D puff designs include additional stitch support where satin columns intersect or stitch in opposing directions. This helps reinforce the foam in those areas, reducing the chance of it separating or showing through and resulting in a cleaner finished appearance.
Every digitizer, software, and design is different. Always stitch a sample and test your designs to determine what techniques and settings produce the best results for your workflow.

SEW PUFFED™ PICTURE TUTORIALS
Step-by-step Picture Tutorials & Overview
Stitch the Non-Puff Elements

Position the Sew Puffed™ Foam over the Outline

Tack Down the Foam & Stitch the Design

Stitch Out Complete.

Use a Sharp Object to Tuck in any Remaining Foam, then use a Heat Gun to Shrink the Rest.

Finished Result

Finished Result x 2

Finished Result x 3

FREQUENTLY ASKED QUESTIONS


